The Instagram Basic Display API provides developers with a powerful toolset to integrate Instagram features into their applications. Whether you're building a social media aggregator, a photo-sharing platform, or a content management system, understanding and utilizing the Instagram Basic Display API is essential. In this comprehensive guide, we will walk you through the process of getting started with the Instagram Basic Display API, accompanied by practical examples to help you grasp the concepts effectively.
Facebook, in an effort to protect their users’ safety and privacy, recently overhauled their Instagram API
To follow this tutorial, please make sure you meet the following requirements:
- A registered Facebook Developer account: This is necessary to gain access to the API.
- An active Instagram account: You will be utilizing the API to retrieve profile and post data from a real Instagram user who has granted permission to your "app" for this purpose. Therefore, you need to possess an Instagram account to act as the user and authorize your app.
- Postman: It is recommended to use Postman for better request management and organization during the tutorial.
Are you ready to get started? Let’s go.
Setting Up Your Facebook Developer Account
To access the Instagram Basic Display API, you need to set up a developer account
We must first establish a new app on Facebook. Each Facebook-registered app has a unique set of API keys and secrets that the app's developer will need in order to interact with any of Facebook's APIs, including the Instagram Basic Display API.
Once you have logged in to Facebook for Developers, you will see a menu option for "My Apps," which you should select by clicking the Create App link.
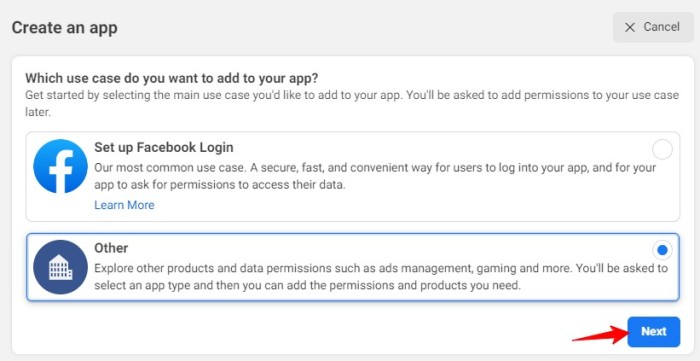
Select 'Other' as use cases and then click on next
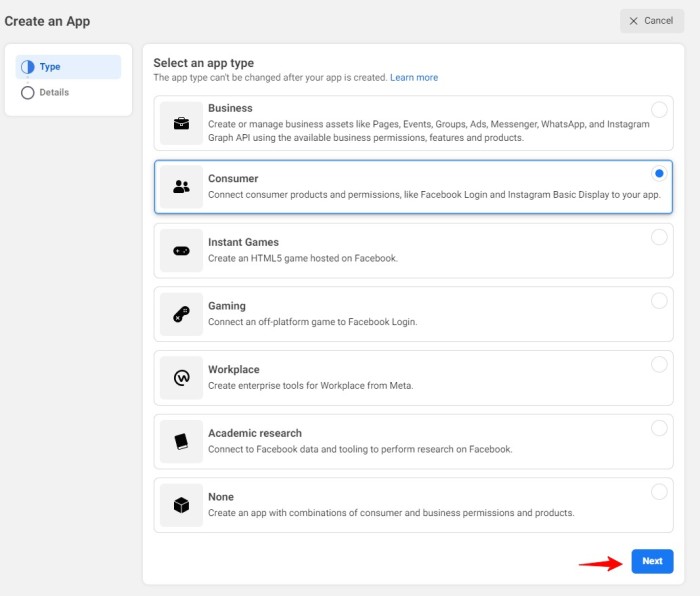
Now select 'Consumer' as app type and click on next, as Business type does not support basic-display-API.
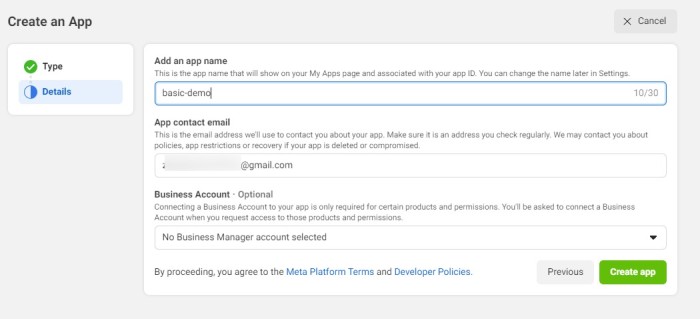
Now enter app details like name, contact email and then click on 'Create app'.
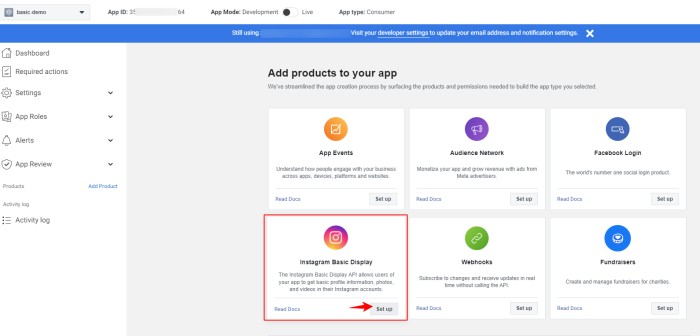
Now you will see list of product which you can use in your app, here select Instagram Basic display from Products.
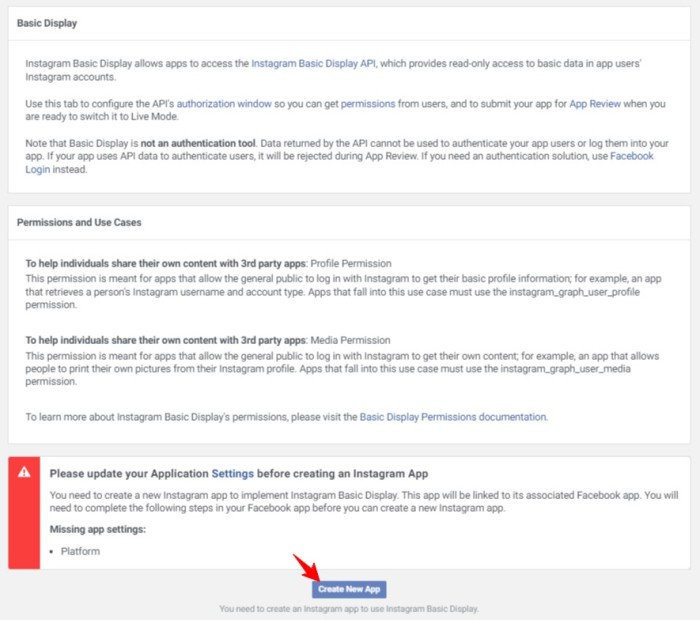
Then click on create app to create new Instagram app.
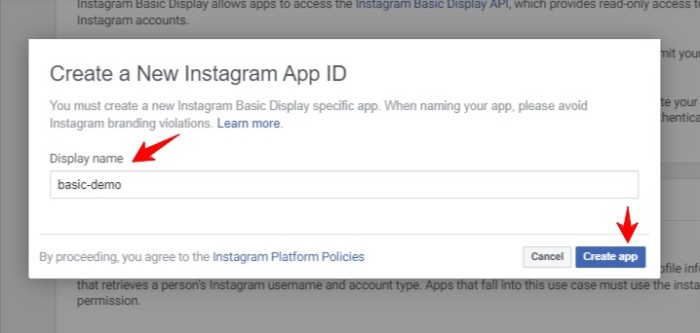
Next, Enter Instagram app display name and continue.
Now, your app has been set up as an Instagram App.
You'll see that the current "Basic Display" page now includes several additional details, such as your Instagram App ID and Instagram App Secret.When you later perform API calls, you will require your Instagram App ID and Instagram App Secret.

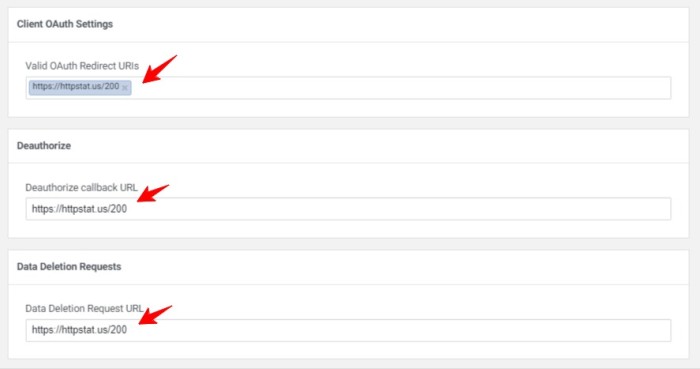
You will find fields to add your Valid OAuth Redirect URIs, a Deauthorize Callback URL, and a Data Deletion Request URL below on the page. Since you must provide valid web sites for all three of these in order to proceed, only the Valid OAuth Redirect URI will come up later.
When a user completes a particular action on Instagram, Facebook or Instagram will lead them to one of these specific web sites. As an example, Instagram has a feature called as a "Authorization Window." It is that window that appears and informs you that App would like access to your Instagram data and the user will be sent back to your app to a legitimate OAuth Redirect URI after telling Instagram to authorize this.
we need a URL for a web page that yields a valid200 HTTP status. I recommend using httpstat.us. This site returns HTTP status codes based on what you request. For example, https://httpstat.us/200 returns a status 200, while https://httpstat.us/403 returns a status 403. We’re going to use 200 for all of our entries:
A URL for a website that returns the HTTP status code 200 is required. I advise making use of httpstat.us. Depending on your request, this website responds with an HTTP status code.
For instance, the URLs https://httpstat.us/200 and https://httpstat.us/403 both return the status 200 and 403, respectively. The number 200 will be used for each of our entries:
Now first save your changes and then click on Add Instagram Test user.
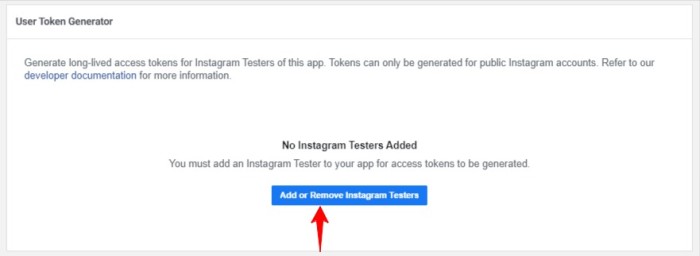
At the bottom of the page, under “Instagram Testers,” click on Add Instagram Testers.

Enter the login for the Instagram account you'll be using to experiment with the API in the popup that appears.
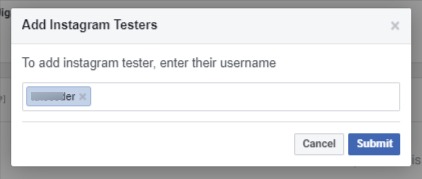
Then, click on Submit.
Accept Instagram Tester Invitation
You are required to log in to the Instagram account you choose for the tester account using your browser, go to the Settings menu, select Apps and Websites, find "Invitation list," and then click Accept.
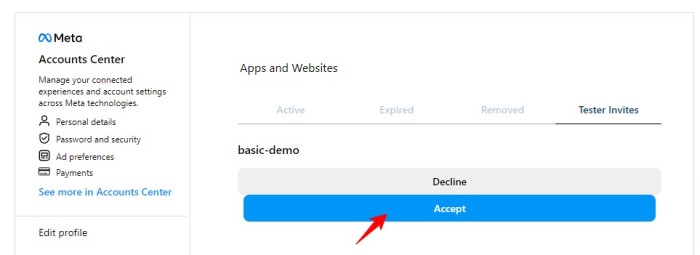
Your app has been set up completely. It is set up to communicate with Instagram.
Authorize Your App's Access to Your Instagram Account
Now we need this below URL to get our Authorization code for Instagram account.
https://api.instagram.com/oauth/authorize
  ?client_id={instagram-app-id}
  &redirect_uri={redirect-uri}
  &scope={scope}
  &response_type=code
Use the Instagram App ID from the Products 🡒 Instagram 🡒 Basic Display page for your app. Do not use your Facebook App ID.
Use https://httpstat.us/200 as the redirect-uri for your app's Valid OAuth Redirect URI.
Set the scope as user_profile,user_media to allow API testing to access the Instagram user's profile and media data.
The authorization url should look like this when combined.
https://api.instagram.com/oauth/authorize?client_id=803210244661898&redirect_uri=https://httpstat.us/200&scope=user_profile,user_media&response_type=codeIn your web browser, type that URL.
You will then be prompted with the Authorization Window:
Select Authorise.
Instagram now sends your browser to https://httpstat.us/200, where it simply displays the status 200 OK. However, if you check the URL bar in your browser, you should see something like this:
https://httpstat.us/200?code=AQD1FNuCD52Y7kJzw0uygg6rbofgJMLk3LWdeTqVZw8WthcZh3NhMCm-4VcO24Hxlci6u8ItNFVf3QhmCtMAIhb0suvAvSTSiI8VB4MEmwtVJDHo0krHFw2DSY1cQVYk4fYJ3BGDCxInAgJDb-O-4848ZhjhRXGzN-qr5bWrBY5y0ErTPMsTlLL44s_qI2DFS3bWn8qAgYMKoWpOHyCmupcgRBd4Dx7v1KuoEcyooOICBg#_Now Our authorization code is here! We can start using Postman to call the API using this code.
Everything in the redirect URL after code= up to (but excluding) the #_ at the end is the authorisation code. Thus, the authorisation code in the earlier URL would be:
AQD1FNuCD52Y7kJzw0uygg6rbofgJMLk3LWdeTqVZw8WthcZh3NhMCm-4VcO24Hxlci6u8ItNFVf3QhmCtMAIhb0suvAvSTSiI8VB4MEmwtVJDHo0krHFw2DSY1cQVYk4fYJ3BGDCxInAgJDb-O-4848ZhjhRXGzN-qr5bWrBY5y0ErTPMsTlLL44s_qI2DFS3bWn8qAgYMKoWpOHyCmupcgRBd4Dx7v1KuoEcyooOICBgKeep that code. Since permission codes are only valid for one use per hour, we'll need them.
Converting the Authorization Code into a Short-Lived API Token
Get Short term access tokens
Create a new POST request in Postman.
Set the request URL to https://api.instagram.com/oauth/access_token
Attach the following parameters as form data in the request body:
client_id: Your Instagram App ID
client_secret: Your Instagram App Secret
grant_type: authorization_code
redirect_uri: https://httpstat.us/200
code: The authorization code from the previous step..
Ensure that the request in Postman matches the given example:
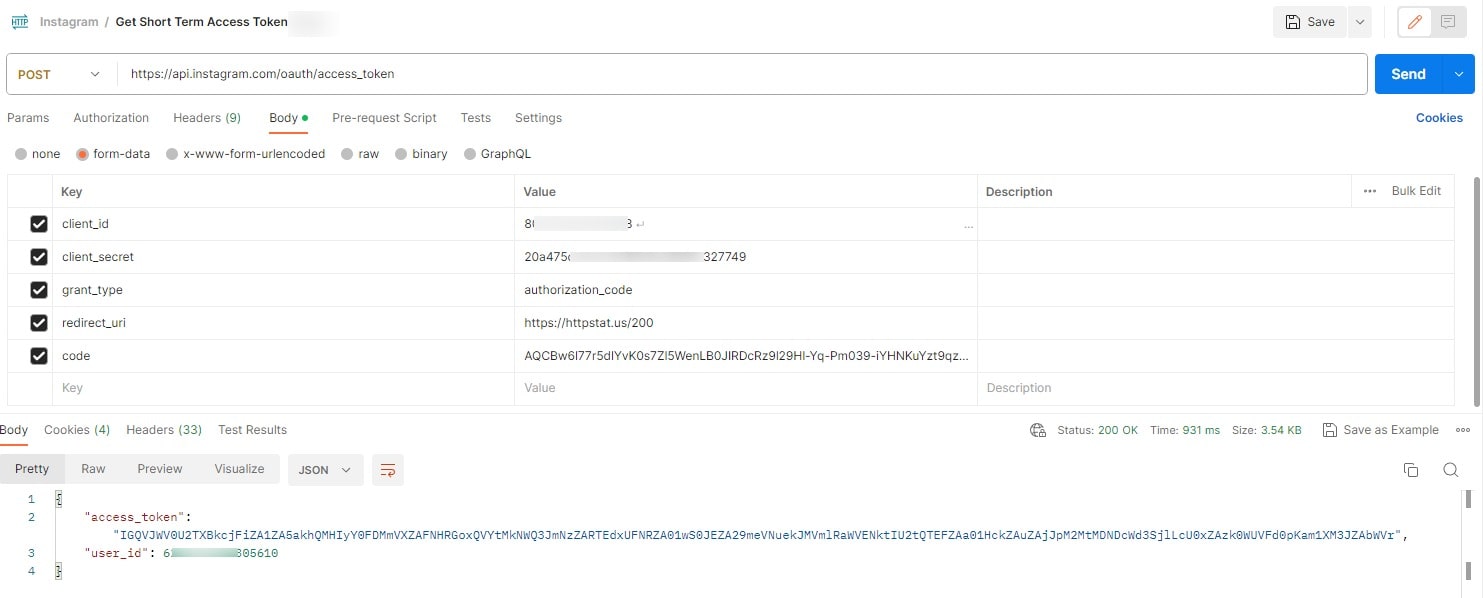
In response you will get:
user_id : unique for that Instagram test user (Will use later)
access_token : It is short-lived token, which is only valid for 1 hour,
This temporary access_token will only be used once to exchange it for a permanent token. because we will only ever use the single-use token
Transform Short-Term Tokens into Long-Term Tokens
Obtain a long-lived API token by making a request with a short-lived access token.
In Postman, create a GET request to https://graph.instagram.com/access_token.
The GET request requires the following query parameters:
client_secret: Your Instagram App secret
access_token: Use the short-lived access token obtained from the previous request.
grant_type: ig_exchange_token
Overall, the Postman request should appear as follows:
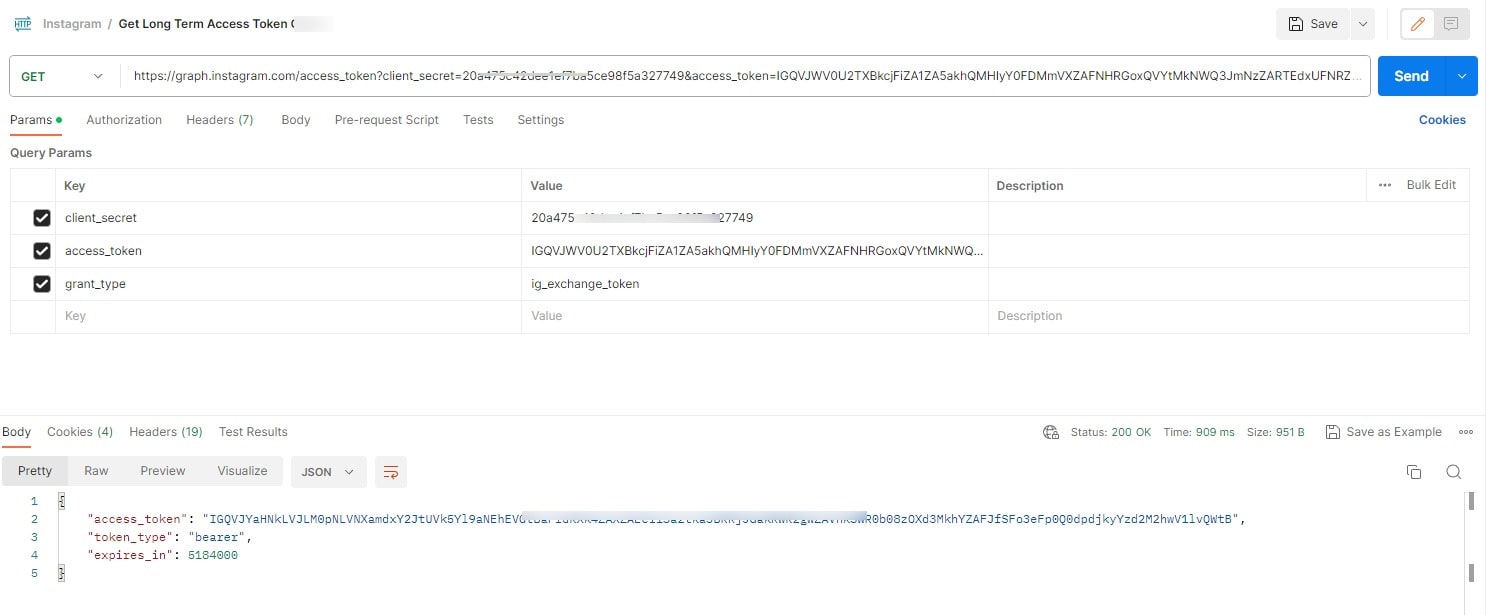
You will receive a JSON response containing access_token, token_type, and expires_in.
You can now use this long access_token to conduct API queries for the following 60 days. As long as the token is valid and at least 24 hours old (and hasn't been revoked by an Instagram user who has de-authorized your app), you can also refresh it to prolong its validity for an additional 60 days.
Access Instagram Profiles using a Long-Lived API Token
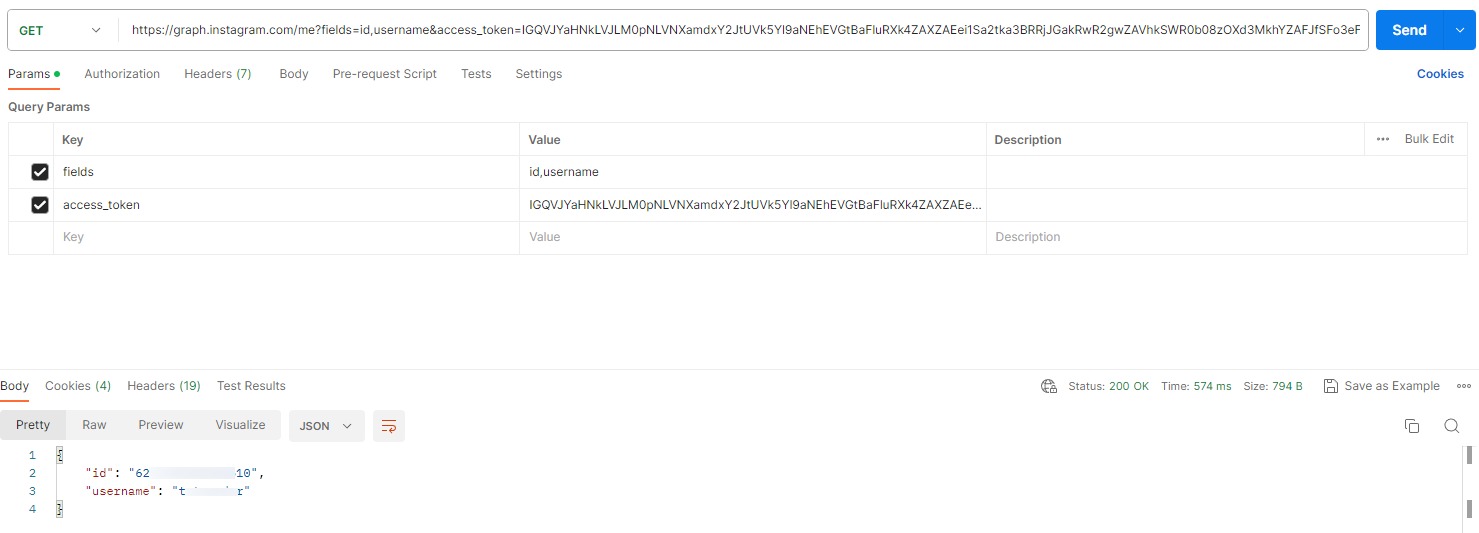
To retrieve the user's username and id, we'll send a GET request to https://graph.instagram.com/me in Postman. The query parameters will include the fields parameter, which is a comma-separated list of the desired fields.
Refer to the user reference for available fields.
Get Your Profile


Leave a Comment
Share Your Thoughts