In this article, we will see how to create subdomain for your application with using AWS EC2 and Route53.
What is Subdomain?
A subdomain is a website that is a part of another website.
A subdomain can be used to create an additional site, such as a company’s blog or to create an additional email address for the account holder.
Create Subdomain in AWS with Route53
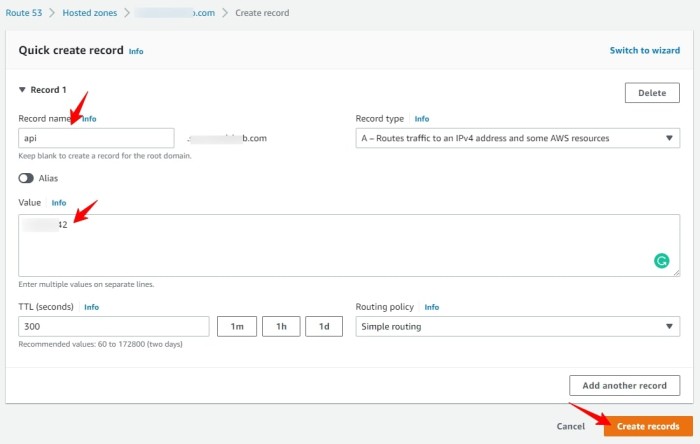
Select Route53 from the services and select your domain hosted Zone from the list
Click on Create record.

SSH to your instance
Create a Virtual host:
Go to /etc/nginx/sites-available, which will list all available virtual hosts, to create one use below command:
sudo touch api.example.comserver
{
listen 80;
listen [::]:80;
server_name api.example.com;
location /
{
proxy_pass http://localhost:8083;#whatever port your app run
proxy_http_version 1.1;
proxy_set_header Upgrade $http_upgrade;
proxy_set_header Connection 'upgrade';
proxy_set_header Host $host;
proxy_cache_bypass $http_upgrade;
}
}Now To activate created virtual hosts, run the following command:
sudo ln -s /etc/nginx/sites-available/api.example.com /etc/nginx/sites-enabled/Now restart the nginx using below command:
sudo service nginx reloadAdd SSL:
sudo certbot --nginx -d api.example.com


Leave a Comment
Share Your Thoughts