In this tutorial, we will learn about AWS cli and how to install it on windows machine.
What is AWS CLI?
A tool that enables you to to interact with the AWS services using commands from your command-line shell.
Setup AWS CLI on Windows10:
1.Go to below link and download MSI installer for windows
https://docs.aws.amazon.com/cli/latest/userguide/getting-started-install.html
2. After downloading click on it to start installing process and follow the steps to make installation done.
3.Once Installation completed go to command prompt and type below command to verify installation:
aws --versionThen if you see result something like this :
aws-cli/2.4.4 Python/3.8.8 Windows/10 exe/AMD64 prompt/offThat means you have successfully installed AWS CLI on your windows.
How to Create Access Keys for AWS CLI?
NOTE : Do not use your root account to create security credentials, use your IAM User.
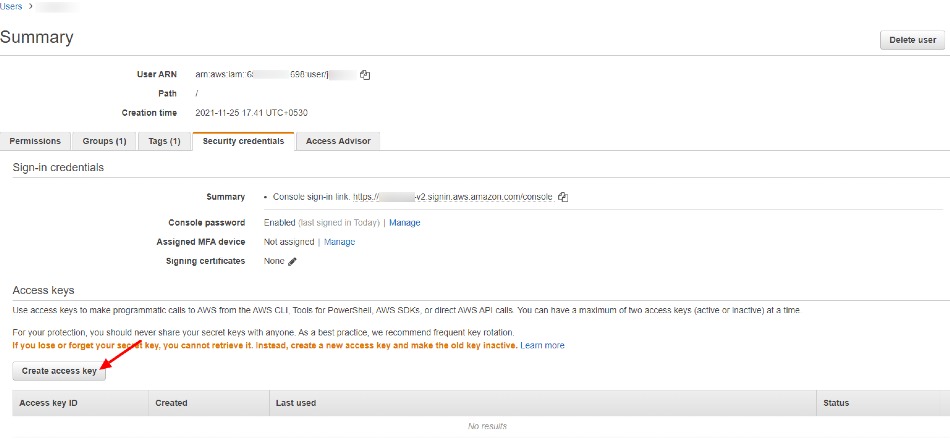
1.Go to IAM dashboard and select users from sidebar, which will show users list in IAM, then click on username to create Access keys.

2. Now move to Security Credentials tab and click on Create Access Key button, which will create Access key and Secret Key for you.


Download Access keys or Copy them and keep them on safe place for later use.
4. Open Command prompt and type below command and follow instructions to configure AWS cli.
aws configure
5.Now you have successfully configured AWS CLI to verify it use below command which will shows the list of IAM users.
aws iam list-users


Leave a Comment
Share Your Thoughts